Hello Everyone,
Since I have been making many Half Square Triangles (HSTs), of late, I thought it would be a great time to do a tutorial on one of my favorite ways to create these very versatile beauties. I know that there are many ways to make them, but I tend to like this one the best.
So let's begin....

First, you must have your two strips of fabrics that will make up each triangle in the HST. In this case, I cut my strips to a width of 4.5 inches wide and I have a solid and a print.
The end result will be a 3.5 inch unfinished HST, once pieced into the quilt it will be a 3 inch finished HST.

Next sub-cut them into squares the same width as the strip. Here the are cut into 4.5 inch squares.

Then place them RIGHT sides together.

They should match up on all sides, RIGHT sides together.
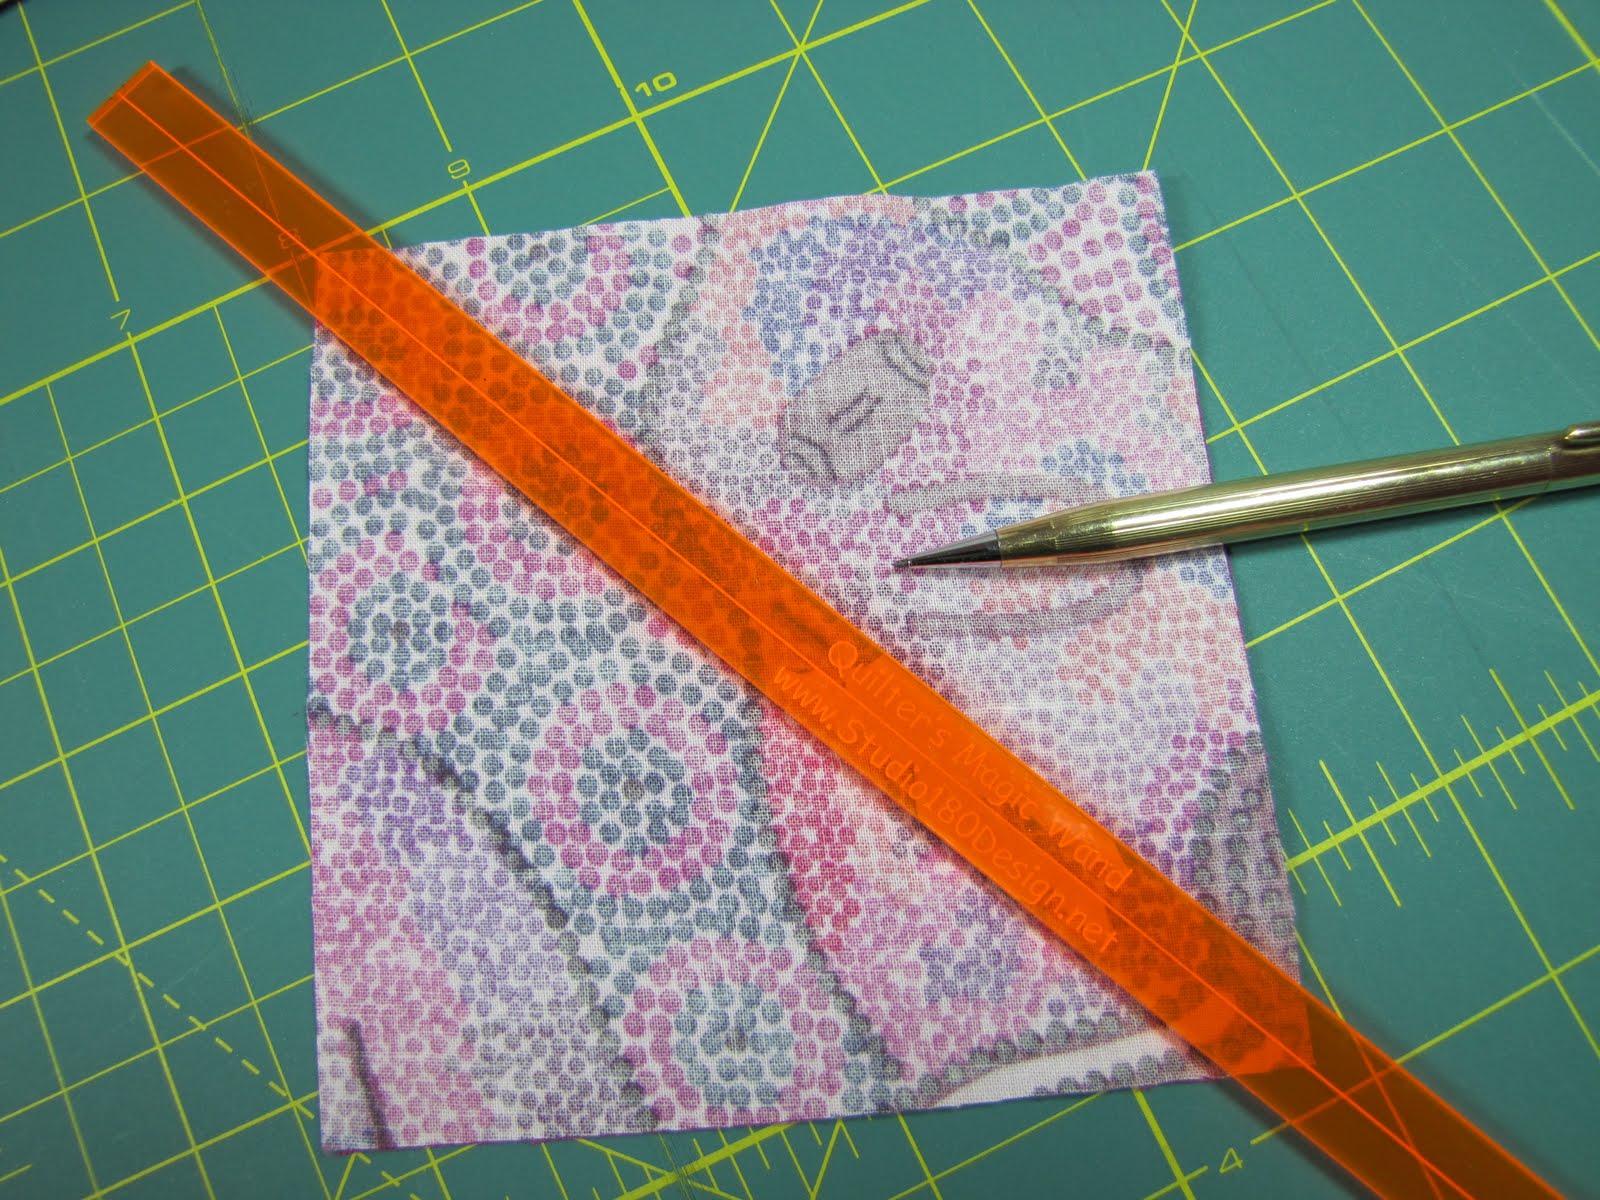
Now from one corner to the next you will use a tool, such as the Quilter's Magic Wand, to mark your sew lines.

You will draw them on either side of the wand. I used pencil and this is fine as the lines will not be seen, they will be sewn over and are on the WRONG side of the fabric.

Next you may choose to pin on the outsides of the drawn lines. You don't have to, but if this is your first time using this method you may want to do so.

Then you will sew ON one of the lines.

Then flip the square around and sew on the OTHER line.

Once the lines are sewn, I like to set the seams with a hot iron.

Now take your ruler and lay the 1/4 inch line right on the stitching so that the edge of the ruler is in between both stitch lines.

Then cut, with your rotary cutter, down the center of the stitch lines. This will give your 1/4 seams for both sides.

Now you will press the triangles open by pressing the seams to one side. Voila, you have HSTs, but you are not done yet. They are not the size that we need.

Now take your square up ruler and place the diagonal line ON the seam with the size of the FINAL square inside the edges of the HST. You will see here we have the 3.5 inch lines above the bottom and left edge of the square.

Now trim the right side and top of the HST.

Then flip your HST around and place the 3.5 inch lines RIGHT ON the edges that you just cut. Because we flipped the HST the edges now are on the bottom and left side. You can see how the lines are right on the edges.

Now trim the right side and top edge again.

This is about how much waste you will have. But now you have the perfect size HSTs and any error in sewing that you might have made (although I know you didn't) has been erased... so to speak. All your HSTs will be the same EXACT size.
Just repeat the steps above for many more perfect HSTs. By the way, I like to chain piece these, so you can do each step in multiples so as to speed up the process.
Now onto the possibilities....

You can arrange them like this or...

like this, one of my favorites, a pinwheel! Or like this...

Or like this...

Or like this...

Another of my favorites... the flying geese.
Now that you have all the details, you should go and play!! I would love to see what you all come up with, please share!! I have some photos of a couple of quilts that I made with just HSTs in my Flickr set. Just click here to see them.
Until Next Time...