Hello Everyone,
As promised, I wanted to show you how to use the Lil' Twister Template to make the tessellating pinwheels. I hope you enjoy and will give this a try.

First start with your selection of fabrics. I chose silk dupioni. If you use silks, I highly recommend that you back them with a very lightweight fusible interfacing. It helps to prevent fraying and any distortion by stabilizing the fabric.

Then you will cut your fabric into 5" squares (perfect for the pre-cut charm packs) and arrange them in a pleasing manner. I arranged them in a 6 X 4 layout. You can choose less or more if you like, but the size of your finished project will either be smaller or larger.

Then sew all the blocks together in rows and then join the rows.

Now you will add a 3" inch border to all 4 sides. It looks pretty like this, but will look even prettier when complete.

Now you will take your Lil' Twister template tool by CS Designs, (it can be found here in my shop) and align the black lines on the template on the seam lines as shown above.
You should start in the top left corner of your bordered blocks. You will have some of the border and some of the block in the first square. Cut around the template for your first block. Then move to the next seam to the right and so on until you get to the end, then move to the next row.

As you go from seam to seam it is important to keep your blocks in order to make each pinwheel block, as shown above.
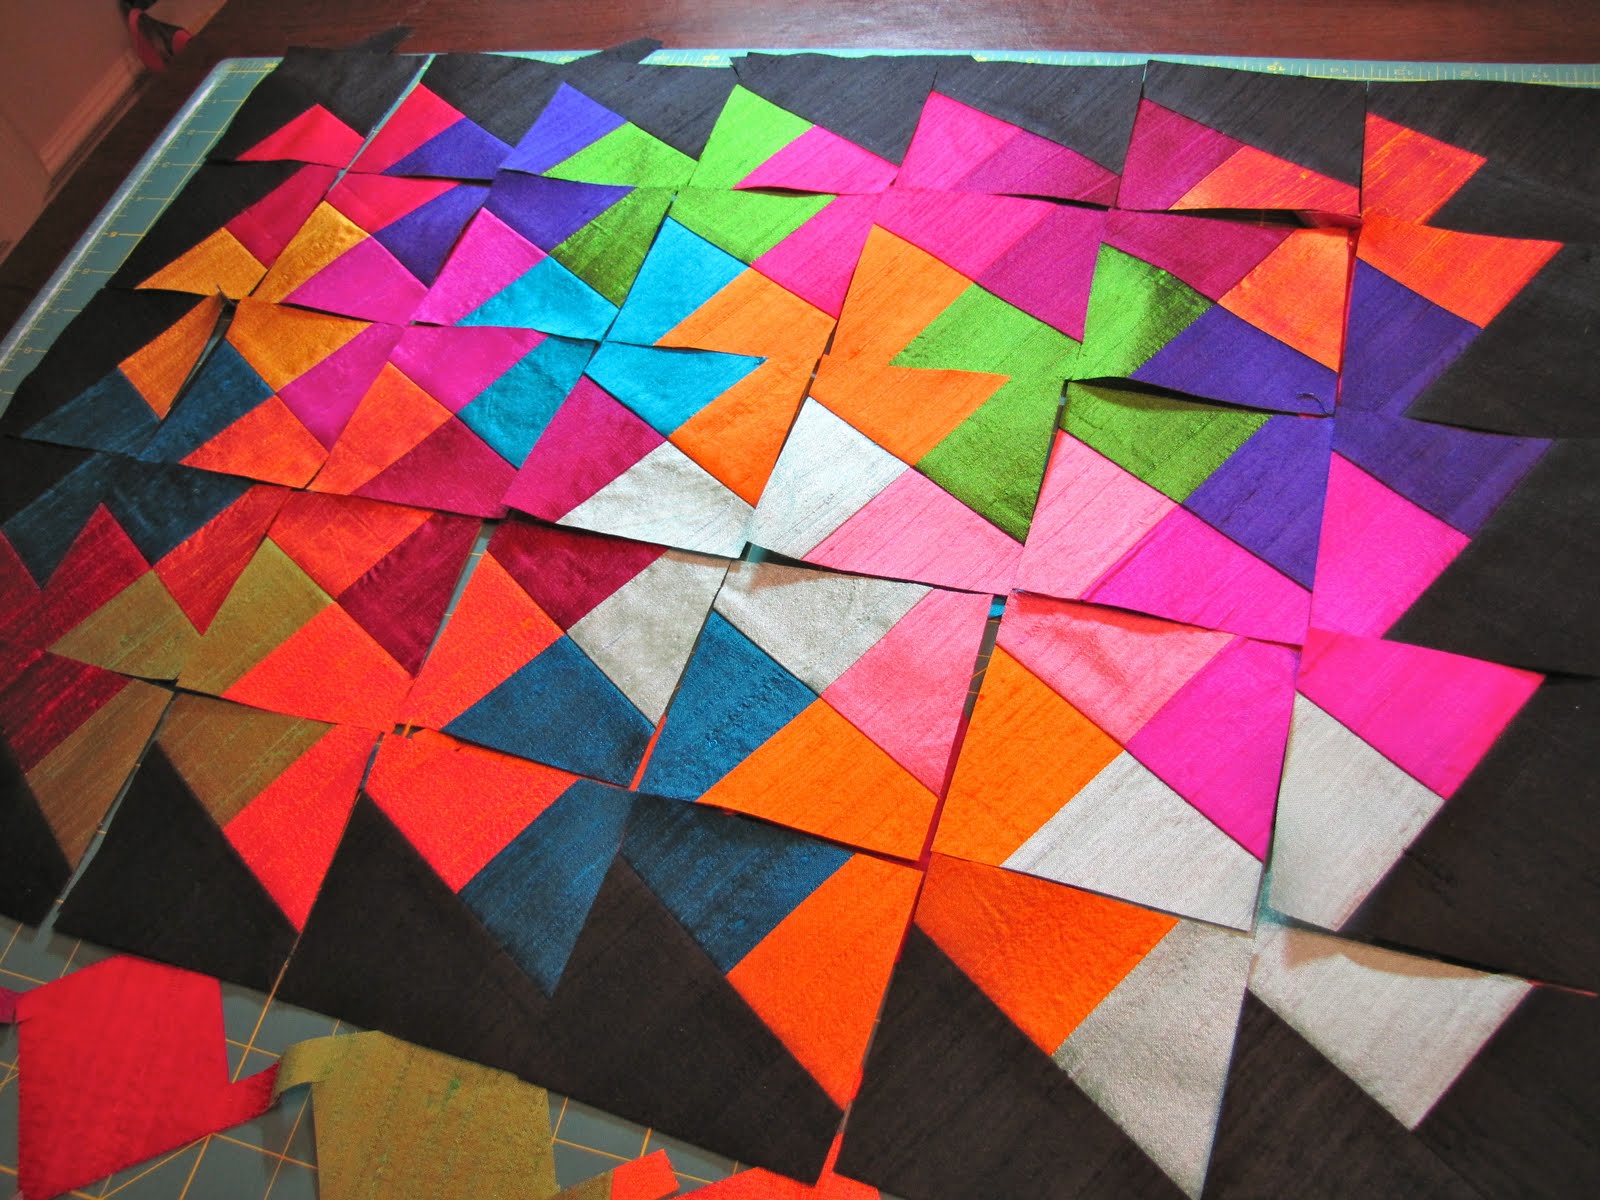
Once you are done, you will have something that looks like this above. They now need to be sewn together by rows and then join the rows together.

Your original piece will look like Swiss Cheese (see above). Now all those little squares that you see, cut them into 1.75" squares for the outside border. You will need more from your scraps, so definitely cut more 1.75" squares.

Now that you have joined the blocks, your piece will look like the above, no border. You can stop here or you can now get creative.

I chose to add another 3.5 inch border of black.

Then to the black border I added the 1.75" squares and all the extras to form the outer border. You can really get creative here, maybe a wonky border, flying geese, longer piano keys, the sky is the limit.

Finished size 24 X 30
This is what your final piece will look like if you do what I did. If you do something else, I would love to see your version.
The Lil' Twister is so much fun! There is also a bigger template for use with the 10" Layer cake pre-cuts as well. Currently, I only stock the smaller version. Click here for yours!
I hope you have fun with this, please send me your photos.
Don't forget to enter the fabric GIVEAWAY on this post!!
Oh, and by the way, ALL Westminster Fabrics are marked down to $7.15 per yard through 2/4/11. Find them by clicking here.
Until Next Time...